Configure Azure Active Directory SSO with LCvista
Follow these steps to successfully configure Azure Active Directory SSO for your site.
1. Open the Active Directory Portal to add and configure the LCvista applications
- Log on to your portal.azure.com.
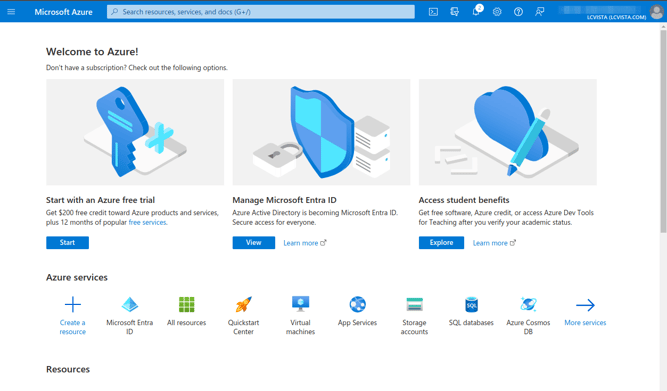
- Open the Microsoft Entra ID menu.
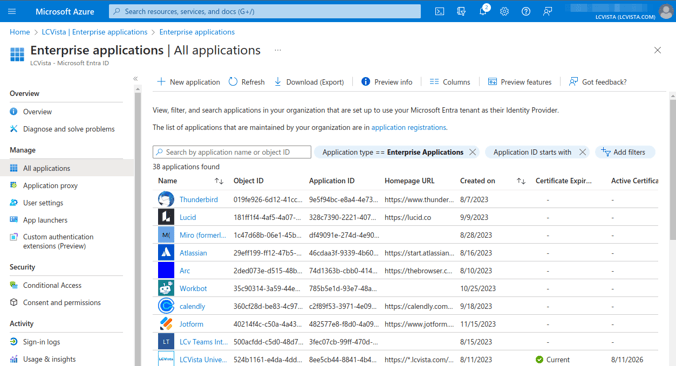
- Select Enterprise applications from the menu bar.
2. Add LCvista to your applications
- From the Enterprise applications, select All applications.
- At the top of the All applications screen, select the + New application button.
- In the search box, enter LCvista and select the LCvista application to add it.
- Return to the Overview menu to begin configuring the application for SSO.
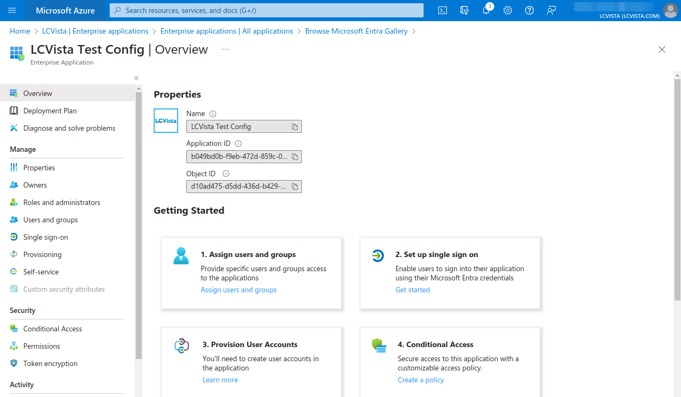
3. Configure the LCvista Application
The following example assumes the site prefix (or LCvista subdomain) is “acme”. Follow these instructions with your company’s assigned prefix.
- From the LCvista application overview: select Set up single sign on from the menu, then select SAML.
- Click Edit to edit the Basic SAML Configuration.
- Add an identifier, reply url and sign on url. You may need to click the Add identifier and Add reply URL hyperlinks to add these configurations.
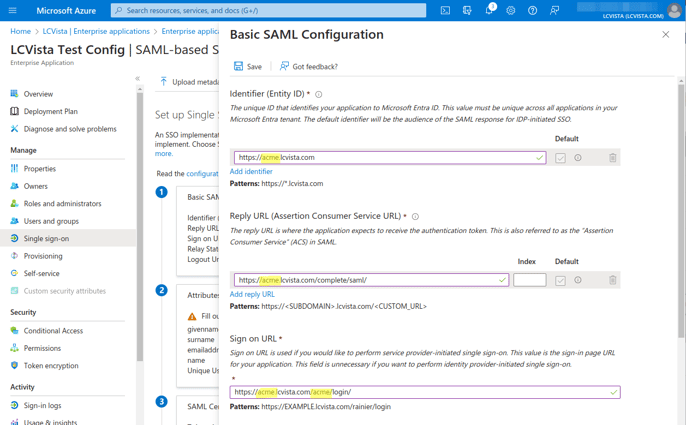
4. LCvista App Domain and URLs
The following example assumes the site prefix (or LCvista subdomain) is “acme”. Follow these instructions by replacing acme with your company’s assigned prefix.- Sign on URL
https://acme.lcvista.com/acme/login/
- Identifier
https://acme.lcvista.com
- Reply URL
https://acme.lcvista.com/complete/saml/
5. Attributes & Claims
LCvista allows for dynamic mapping of Claims to the LCvista First Name, Last Name, Email and Username.
- Select Attributes & Claims to ensure the value that is used as the LCvista username is included in the claims.
- This is typically the “user.userprincipalname” but can be different if your firm decides to use an Employee ID or other attribute as the unique username in LCvista.
6. Download Federation Metadata XML
- Scroll to the SAML Certificates configuration and click Download Federation Metadata XML link to download configuration settings for reference.
- Open the XML file to copy and paste values into your LCvista Settings.
7. Update the SAML Configuration in LCvista
- Login to LCvista as an administrator with access to the Organization menu.
- Select Settings within the Organizations menu.
- Select SAML and check the box to Enable SAML login. Select Save.
- From the open XML document enter the following into the LCvista SAML Config options:
- Entity ID: URL from the entityID field. This will be at top of XML document
- URL: Select the URL in Location property of the <SingleSignOnService> “Redirect” tag. These are found at the bottom of the XML document.
- x509 Certificate: Select the entire text between the <X509Certificate></X509Certificate> tags
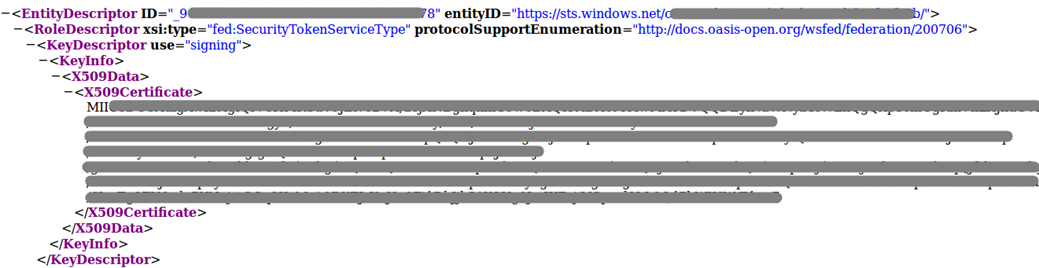

- Ensure attribute mappings are configured correctly. You can verify these in the XML document listed under the <fed:ClaimTypesOffered> tag.
- The Azure AD defaults are as follows:
-
- First name attribute
http://schemas.xmlsoap.org/ws/2005/05/identity/claims/givenname - Last name attribute
http://schemas.xmlsoap.org/ws/2005/05/identity/claims/surname - Email attribute
http://schemas.xmlsoap.org/ws/2005/05/identity/claims/emailaddress - Username attribute
http://schemas.xmlsoap.org/ws/2005/05/identity/claims/name
- First name attribute
Note: The only required mapping is Username. All other mappings are optional and can be set to “-” in LCvista. If First name, Last name and Email attributes are mapped, then these values will be updated in LCvista to the value in Azure AD.
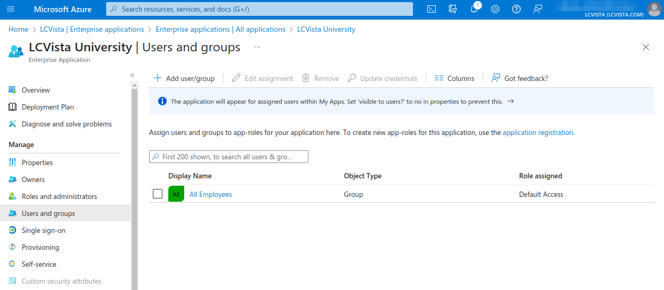
8. Grant User Accounts or Groups access to LCvista application in Azure AD
You'll need to grant access to the LCvista application in Azure AD to begin using SSO.
- Return to the LCvista App main menu and select Users and groups.
- From this screen, you can authorize access to the LCvista application.
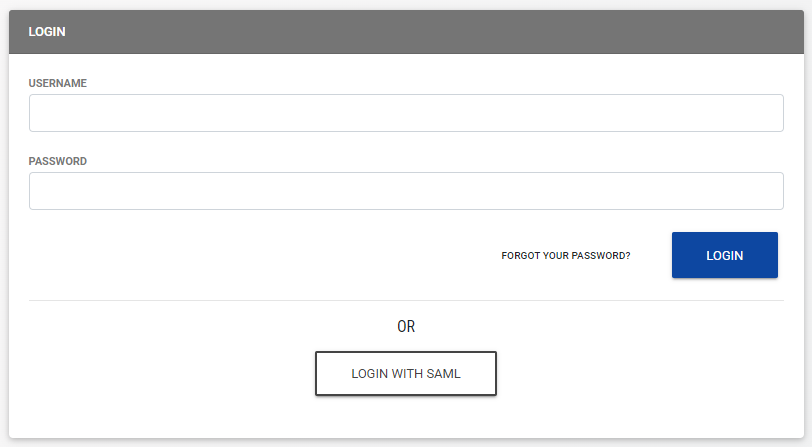
9. Test SSO
- Navigate to your site's login page (example: https://acme.lcvista.com/acme/login/) and select Login with SAML.