Configuring Centrify SSO with LCvista
Follow these steps to successfully configure Centrify SSO for your site.
1. Log in to your Centrify account as an administrator.
- Select Add Web Apps from the dashboard.
- Click the Custom tab, next to the SAML application click Add.

- On the Add Web App screen, click Yes to add the application.
- Click Close to exit the Application Catalog.
-
From the Apps list, the new SAML application you added should open to the Settings page. If it doesn't click the new SAML application in the list to edit the settings.
-
- Update the application Name to your desired name (LCvista), add a description, category and logo. Then click Save.
2. Add the LCvista information into the Centrify Identity Provider Configuration
- Click Trust. Scroll down to the Service Provider Configuration section and select Manual Configuration.
- Note that you will need to replace <site prefix> with your specific site prefix. This is typically the name of your company in lower case.
- Enter the following settings:
- SP Entity ID / Issuer / Audience: https://<site prefix>.lcvista.com/
- Assertion Consumer Service (ACS) URL: https://<site prefix>.lcvista.com/complete/saml/
- NameID Format: emailAddress (or select the agreed upon value you will use for name_id)
- RelayState: <organization slug> In order to launch LCvista directly from Centrify, enter your organization slug. The slug is found on your organization page in the URL field. In the example below the slug is rainier.
- https://rainier.lcvista.com/rainier/
-
Authentication Context Class: X509
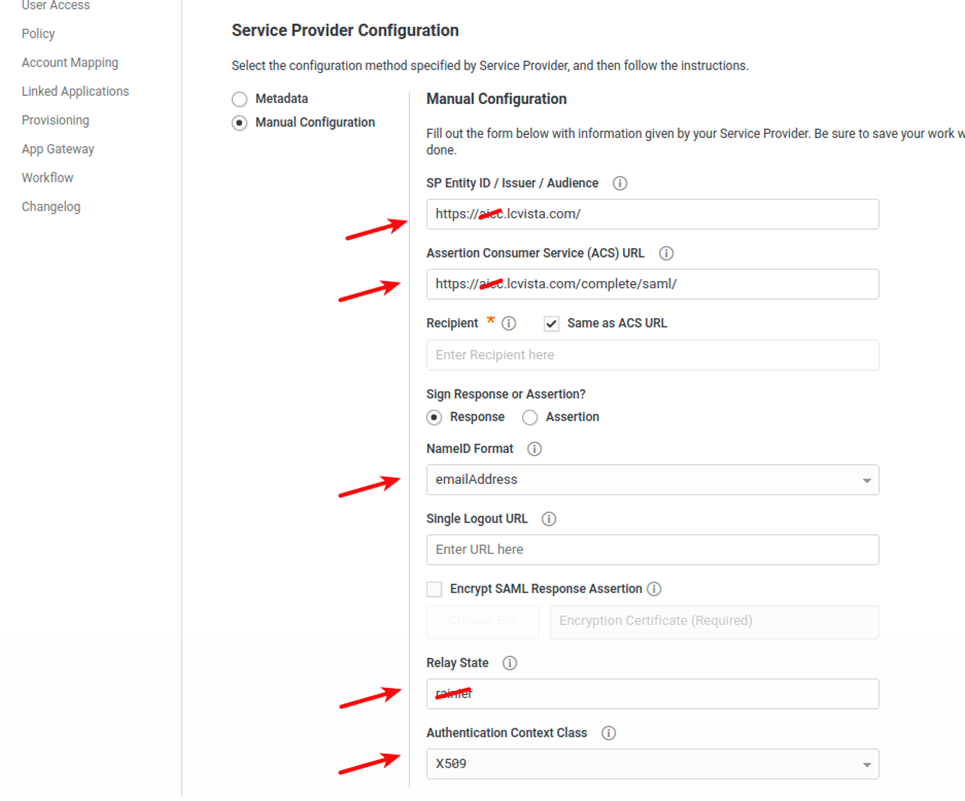
- Click Save to retain these changes.
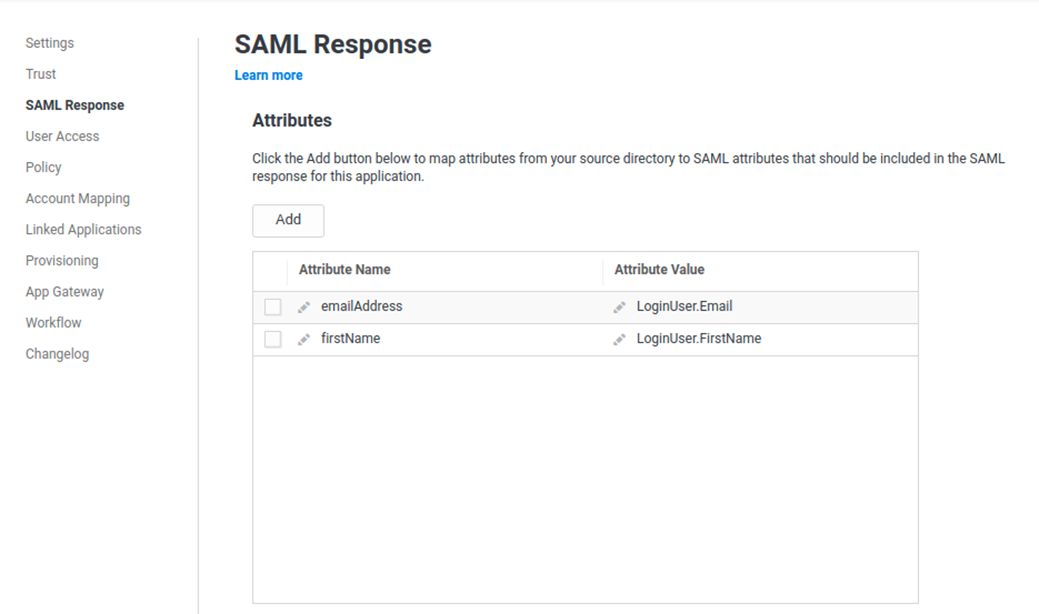
- Click on SAML Response in the menu and add the desired attributes. LCvista supports updates to First Name, Last Name, and Email Address.
- Click on User Access and grant users access to the application.
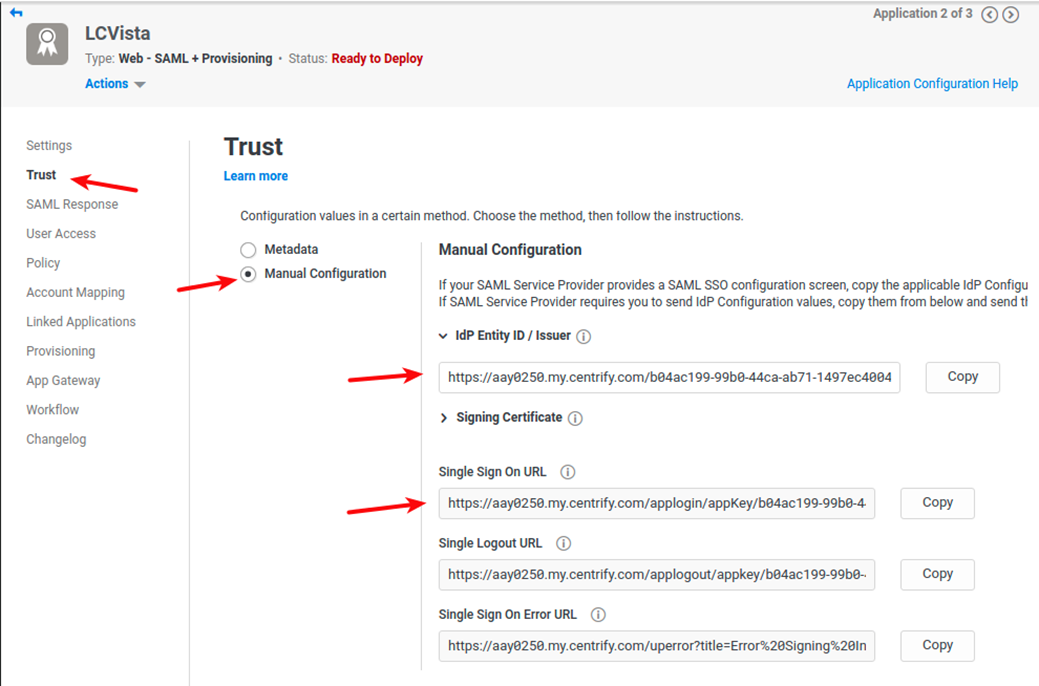
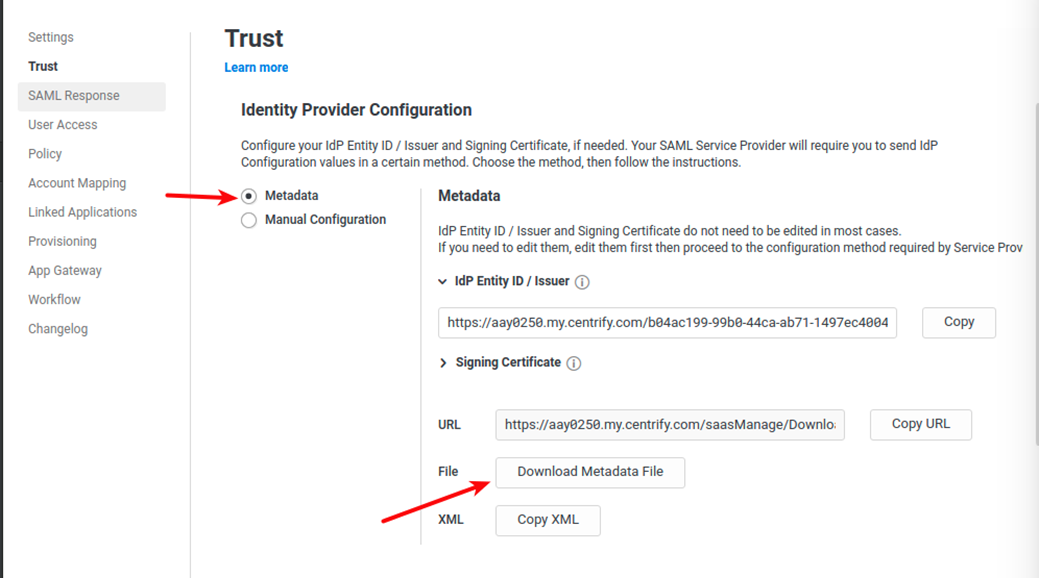
- When finished, click on Trust in the menu. You will use the information in the Identity Provider Configuration Metadata and Manual Configuration areas to configure SAML in LCvista.
-
In the options to configure the Identity Provider Configuration, click on Manual Configuration.
- From the Identity Provider Configuration, copy/paste the IdP Entity ID / Issuer and Single Sign On URL settings into LCvista.
-
-
- Click on Metadata in the Identity Provider Configuration to download the Metadata file.
-
-
Open the Metadata File, copy the <X509Certificate> value and paste the value in LCvista X509 field on the organization page.
-
3. Update the SAML Configuration in LCvista
- Login to LCvista as an administrator with access to the Organization menu.
- Select Settings within the Organizations menu.
- Select Enable SAML login.
- Copy the following values from Centrify into the LCvista SAML Config option:
- Entity ID: URL from the IdP Entity ID / Issuer field.
- URL: URL in the Single Sign On URL field.
-
Please verify Single Sign On URL does not contain any query parameters.
Correct Format:
Incorrect Format:
https://aay0250.my.centrify.com/run?appkey=b04ac199-99b0-44ca-ab71-1497ec4004d8&customerId=AAY0250
-
- x509 Certificate: From the Metadata file, select the entire text between the <X509Certificate> tags and paste this into LCvista.
- In LCvista, map the Attribute Names as defined in Centrify from step 2 above:
- First name attribute: firstName
- Last name attribute: lastName
- Email attribute: emailAddress
- Username attribute: emailAddress
Note: The only required mapping is Username. All other mappings are optional and can be set to “-” in LCvista. If First name, Last name and Email attributes are mapped, then these values will be updated in LCvista to the value in Centrify.
- Click Save on the LCvista Organization page.
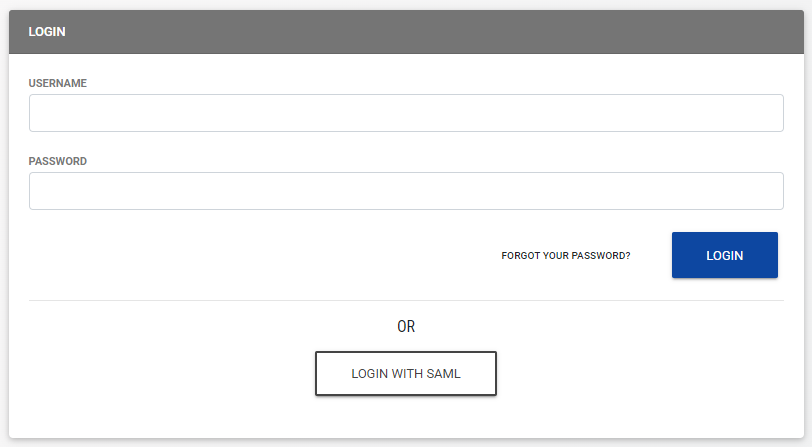
4. Test Authentication
- Navigate to your site's login page at https://<SITE PREFIX>.LCvista.com/<SITE PREFIX>/login/ and select Login with SAML.