Configure Okta SSO with LCvista
Okta offers a standard application which sends the following claims attributes that can be used in LCvista.
|
Claim |
Okta Attribute |
|
firstName |
user.firstName |
|
lastName |
user.lastName |
|
|
user.email |
|
login |
user.login |
The standard application does not allow you to modify the claims being sent to LCvista. Clients that need to use a different Okta Attribute for username are welcome to do so by following these steps to create a custom application.
Follow these steps to successfully configure Okta SSO for your site.
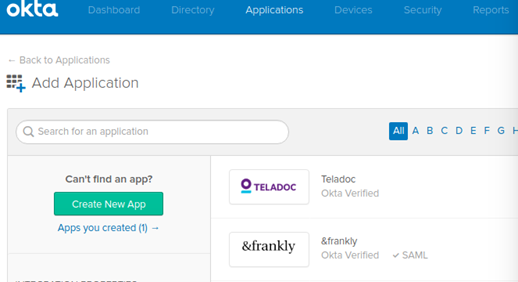
1. Log in to your Okta account as an administrator and then follow these steps:
- Select Add Applications from the dashboard.
- Click the Create New App button.
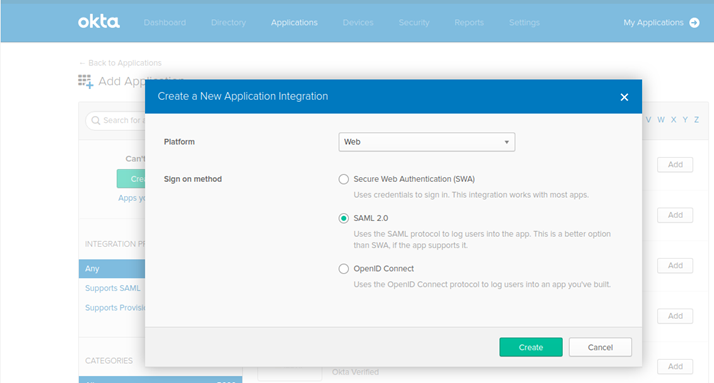
-
On Create a New Application modal choose the following:
Platform: Web
Sign on method: SAML 2.0
2. On the General Settings page, name the application, upload logo (optional), and select the desired App visibility per your Okta implementation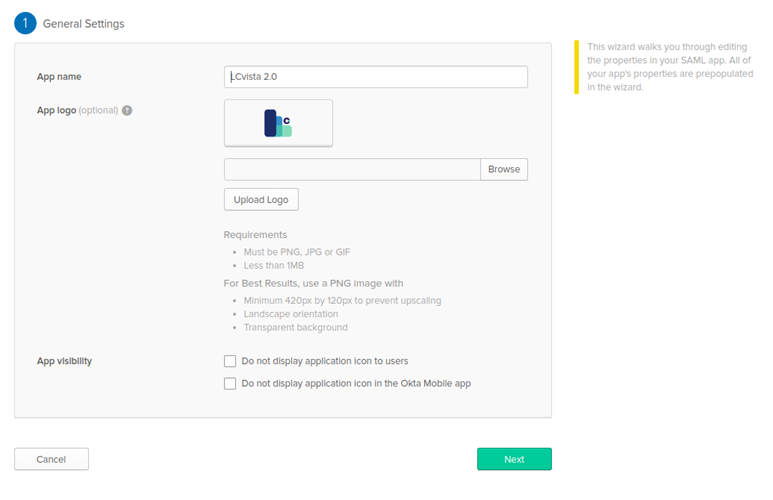
- Click Next to go to the SAML Settings page.
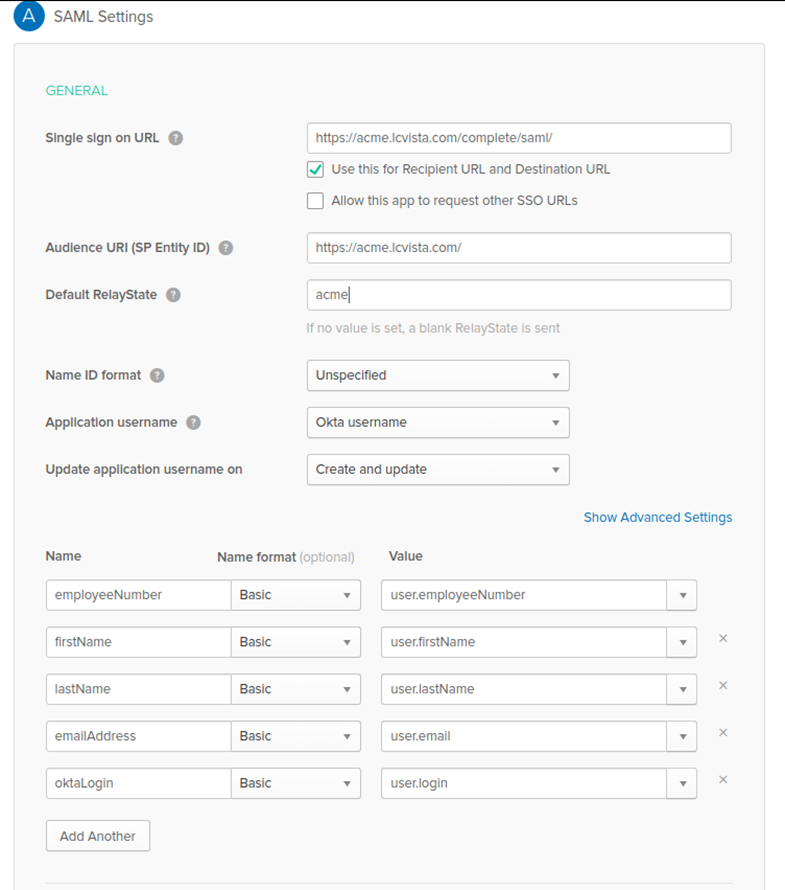
- On SAML Settings, enter the following settings.
- Note that you will need to replace <site prefix> with your specific site prefix. This is typically the name of your company in lower case.
- In the screenshot below the site prefix is acme. The screenshot also shows example custom claim attributes. The attributes your company sends to LCvista may differ.
-
Single sign on URL: https://<site prefix>.LCvista.com/complete/saml/
Check the option for “Use this for Recipient URL and Destination URL” -
Audience URI (SP Entity ID): https://<site prefix>.LCvista.com/
-
Default RelayState: In order to launch LCvista directly from Okta, enter your organization SLUG. This slug typically matches your site prefix. Work with LCvista to get your organization SLUG.
-
Name ID format: LCvista does not use the Name ID for SSO. This is used for logging purposes only and you can choose the appropriate value.
-
Application username: LCvista does not use the Name ID for SSO. This is used for logging purposes only and you can choose the appropriate value.
-
Add Another: Click on the Add Another button to add as many custom claim attributes as you would like. It is in this section that you can customize the username to be used when connecting to LCvista. The oktaLogin value should correspond to the LCvista username. Example: If the LCvista username is email address, then the oktaLogin value should be user.email.
- In the screenshot above you can see examples of the type of attributes. Okta provides the ability to add attributes on user profiles and reference those attributes in application claims. Please see Okta documentation for how to accomplish this per your organization.
3. Accept the defaults for the Show Advanced Settings option.
- There should be no changes required here. Below is screenshot of the current default settings.
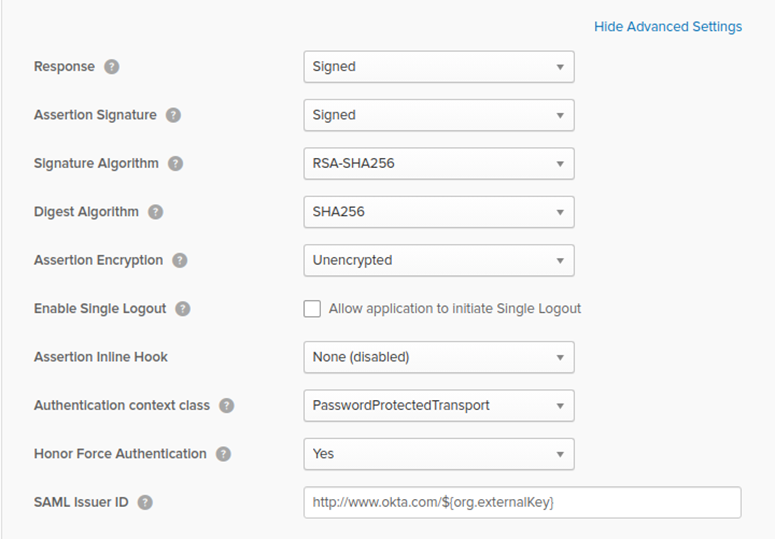
- Click Next and click Finish to save the settings.
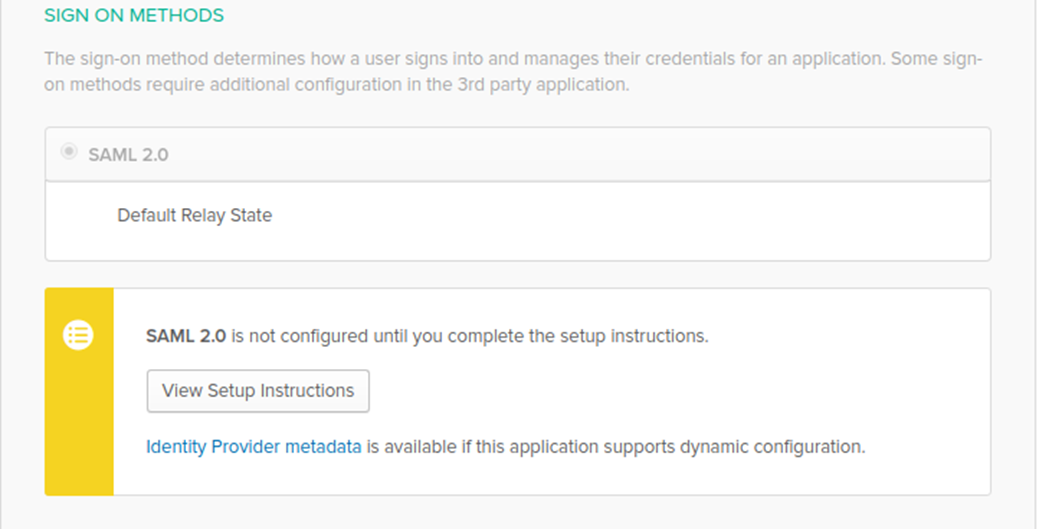
- Click on the View Setup Instructions button to get the details needed to update LCvista.
4. Update the SAML Configuration in LCvista
- Login to LCvista as an administrator with access to the Organization menu.
- Select Settings within the Organizations menu.
- Select Enable SAML login.
- Copy the following values from Okta into the LCvista SAML Config option:
- Entity ID: URL from the Identity Provider Issuer field.
- URL: URL in the Identity Provider Single Sign-On URL field.
- x509 Certificate: Select the entire text between --BEGIN CERTIFICATE-- and --END CERTIFICATE-- in the X.509 Certificate field.
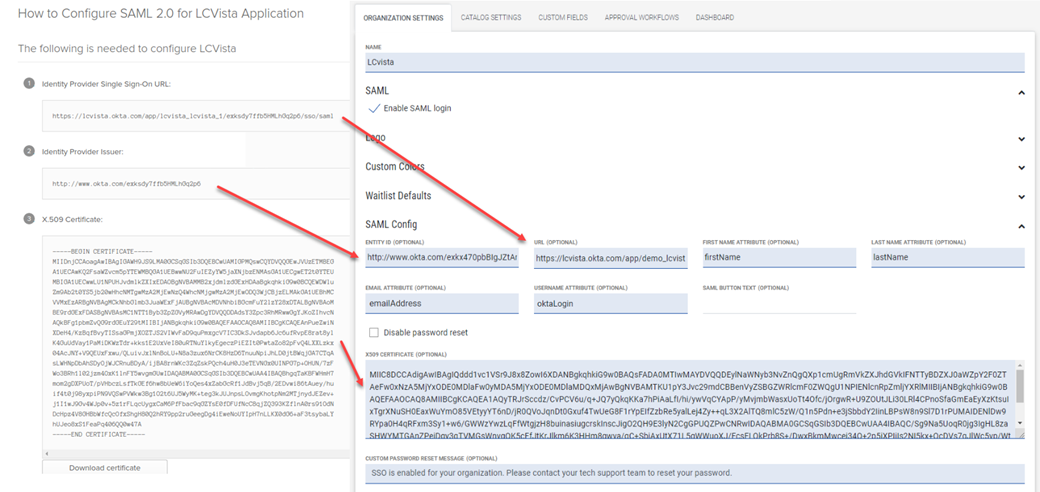
- In LCvista, map the Attribute Names as defined in Okta from step 2 above:
- First name attribute: firstName
- Last name attribute: lastName
- Email attribute: emailAddress
- Username attribute: oktaLogin
Note: The only required mapping is Username. All other mappings are optional and can be set to “-” in LCvista. If First name, Last name and Email attributes are mapped, then these values will be updated in LCvista to the value in Okta.

- Click Save on the LCvista Organization page.
5. Authorize users in Okta
- The final step is to ensure that users in Okta have permission to the Okta application.
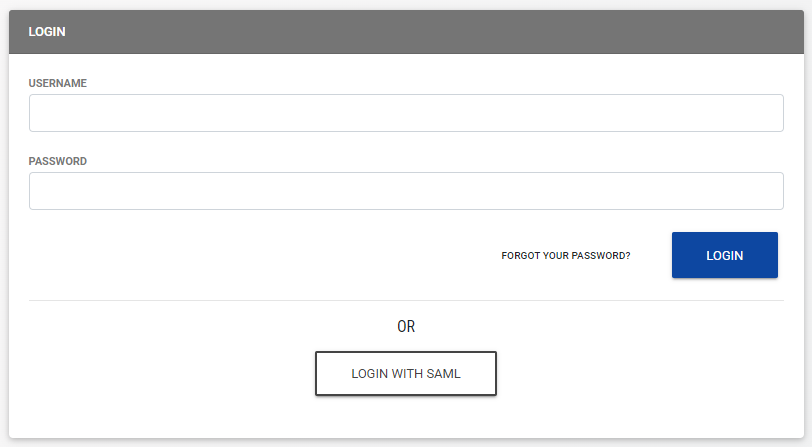
6. Test Authentication
- Navigate to your site's login page at https://<SITE PREFIX>.LCvista.com/<SITE PREFIX>/login/ and select Login with SAML.