
Your firm has enabled functionality to allow you to manage your own jurisdictions.
Getting Started: My Jurisdictions
Access to Modify Jurisdictions
Jurisdiction Profile Field Definition
Understanding the Approval Process
Impact of Approved and Denied Requests
Getting Started: My Jurisdictions
If you have jurisdictions tied to your account, details about requirements will be accessible from the existing Compliance Summary and Compliance detail menus. Both menus are found on the sidebar located on the left of your screen.
If your organization has enabled access to modify your jurisdiction information, you will see a link titled My Jurisdictions within your profile menu. Your profile menu is located on the top right of your screen within the drop down beneath your name.

Access to Modify Jurisdictions
To manage all accessible jurisdictions, first select My Jurisdictions from within your profile menu.
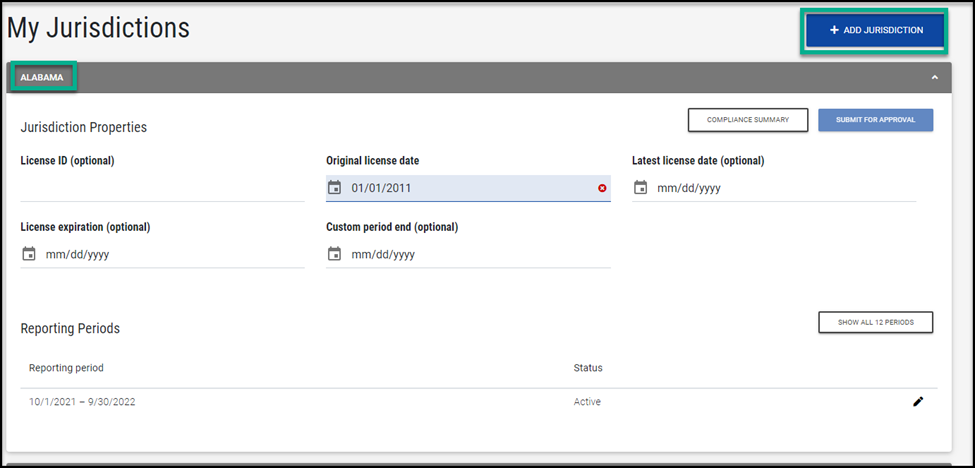
To add a new jurisdiction, select the Add Jurisdiction button that will be visible from the jurisdiction list page.
To modify an existing jurisdiction, navigate to the jurisdiction card that you wish to modify. Adjust the appropriate fields and select Save when you are ready to submit your modifications.
Does your request require approval? If so, scroll down to subsequent section on Understanding the Approval Process.
When adding a new jurisdiction or making modifications to an existing jurisdiction, please note the following section’s definition and best practices around jurisdiction property fields.
Jurisdiction Profile Field Definition
When reviewing a newly added jurisdiction, or making modifications to an existing jurisdictions, there are a number of property fields to consider. Please find definitions for each field below and best practices when adjusting this data.
- License ID: This field is where your License or Certificate number will be entered.
Note: Some jurisdictions, such as Kansas, calculate CPE cycles based on this number. For two-tiered jurisdictions (those with both a certificate and permit), utilize the Certificate number to ensure accurate calculations.
- Original License Date (required): The date the license was first issued to you. Oftentimes jurisdictions calculate CPE cycles based on this date.
- Latest License Date: The start date of your current license period.
- License Expiration: A static field which would need to be updated after each renewal but is not required for CPE tracking.
- Custom Period End Date: This is not a required field and should only be used if a change to your periods is required. Updating this field overrides the period dates automatically calculated by the inputted original license date. This should be used to make periods align with the information provided to you by your state board if it differs from the expected compliance period logic.
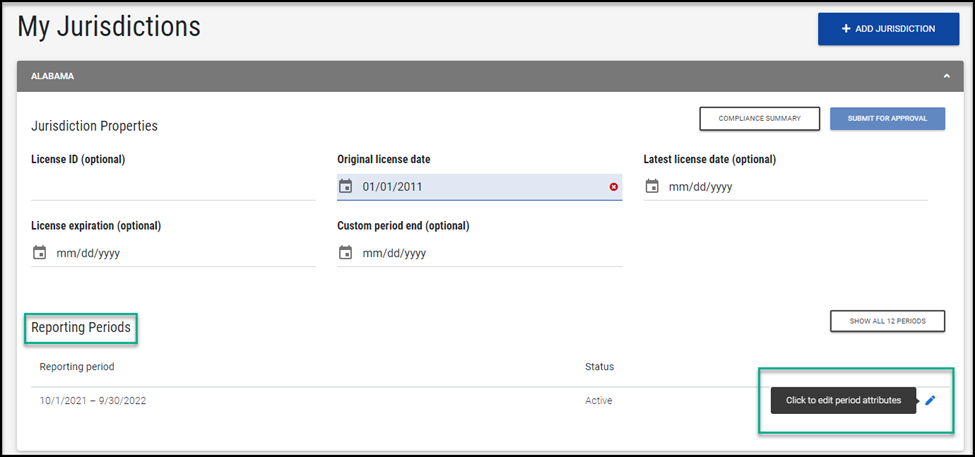
Access to Modify Periods
To modify a jurisdiction’s reporting period, select the edit icon next to the reporting period in question. Modify the data as needed and select Save to finalize your changes. If access to modify jurisdiction periods has been disabled, you will not have access to select this edit icon.
Understanding the Approval Process
If you are adding or modifying a jurisdiction which requires administrative approval, you will be prompted to submit your request. You will not have the immediate option to save your changes.
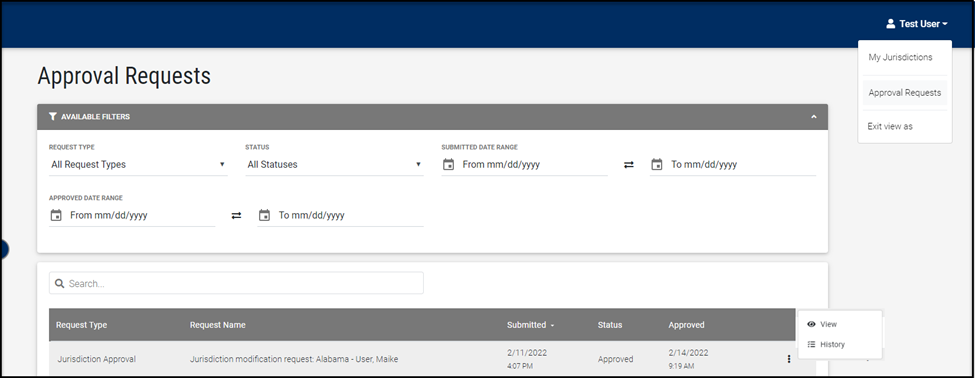
Upon submitting a request, a success message will appear, confirming your submission. The confirmation message will include a link to your Approval Requests menu. This table, which exists within your profile menu on the top right of the form, will house all submissions.
Within the Approval Requests menu, you will have access to pending, approved and denied requests. To access a pending request, select the View option located within the row action menu of this table.
If your administrator has configured automatic notifications, you will receive emails upon submitting a request, when a request is approved, and when a request is denied.
Once a request has been submitted, you will be prohibited from making any further changes on the jurisdiction until that request has either been approved or denied.
Impact of Approved and Denied Requests
Approved Requests
If a request is approved, the jurisdiction or jurisdiction modification, will be immediately visible to you in your Compliance Summary and Compliance Detail menus.
Approved requests will be retained within your Approval Requests menu. These submissions will be marked as approved.
After a request has been approved, you will continue to have access to make additional modification requests, unless the setting for that jurisdiction changes.
Denied Requests
If a request is denied, the requested changes will not be applied to the jurisdiction.
Denied requests will be retained within your Approval Requests menu. These submissions will be marked as denied and can be filtered by this status.
After a request has been denied, you will continue to have access to make additional modification requests, unless the setting for that jurisdiction changes.