
Create, manage and process CPE for Webex Webinars through our LCvista integration.
Integrations
Gathering Credential Information
Entering Provider Credentials
Creating a Session
Launching a Session
Best Practices
Processing CPE
Integrations
For more information on the Integrations feature, and best practices for using this workflow, please refer to our article on Integrations.
Continue reading this article to learn more about creating, managing and processing CPE for Webex Webinars in LCvista.
Gathering Credential Information
Before entering your Provider Credentials into LCvista, take note of the items which will be requested to successfully complete this integration with Webex:
- Client ID: provided after successful creation of a new application; steps below.
- Client Secret: provided after successful creation of a new application; steps below.
To get both the Client ID and Client Secret, you will need to add a new application within the Webex for Developers App.
The steps to generate this information are as follows:
Step 1: Access https://developer.webex.com/my-apps and select Create a New App

Step 2: Select Create an Integration.
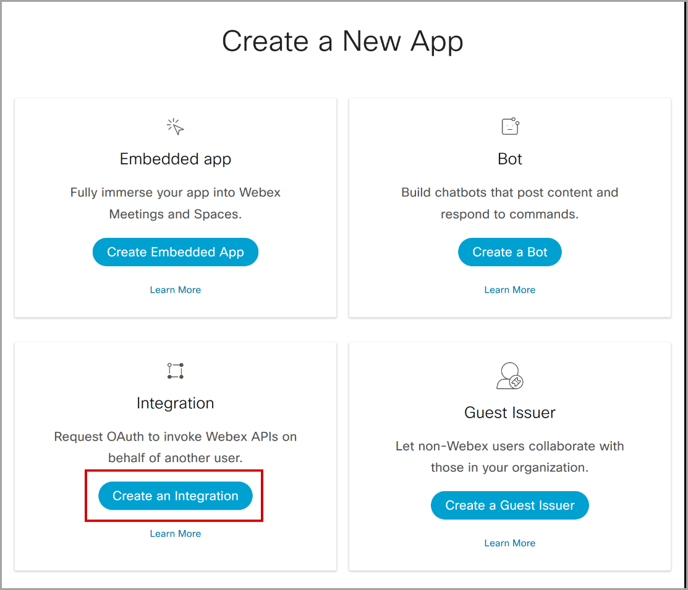
Step 3: On the New Integration form:
- Will this integration use a mobile SDK? Select No.
- Enter the name of your integration as it appears in Webex.
- Upload your icon using the defined parameters.
- Provide a description for this application; to save, text must be entered.

Step 4: Add a Redirect URI.
This should be formatted to include the slug of your organization name within the following URL: https://[org-slug].lcvista.com/webcast_credential_proxy_in/WebexV2Utility/

Step 5: Define Scope Access:
Select the following:
- meeting:schedules_read
- meeting:admin_participants_read
- meeting:admin_schedule_read
- meeting:admin_schedule_write

Step 6: Add Integration.
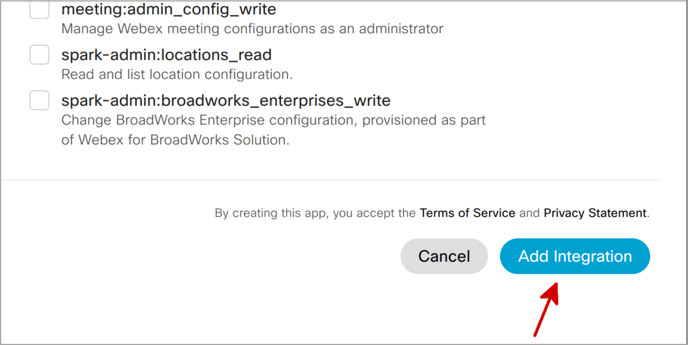
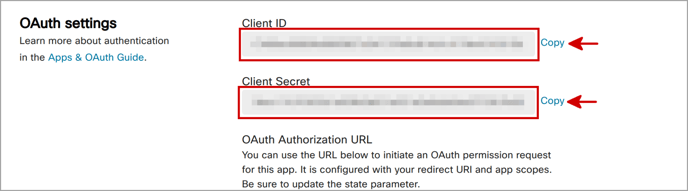
Step 7: Once you have added your integration, you will be routed to a confirmation page listing your Client ID and Client Secret. Save and store these values appropriately, they will be visible by Webex only once.
Entering Provider Credentials
From the Provider menu within LCvista, click on the Add Provider button and enter the credentials requested below.
-
- Name: give your integration a name which will be visible throughout the LCvista administrative pages.
- Client ID: the Client ID designated during the creation of the application. See steps above.
- Client Secret: the Client Secret designated during the creation of the application. See steps above.
Select Validate to confirm credentials. Once they are approved, you can save. You will only need to do this once per provider.
Creating a Session
Once set up of Provider and Rulesets are complete, you can begin to create sessions within LCvista. For more information on creating Integrated Provider sessions, see article Integrations and the section on Creating Your Session.
In addition to the standard fields Webcast Credentials and Integration Provider Ruleset, you will be asked to provide the following additional data when creating a Webex session within LCvista:
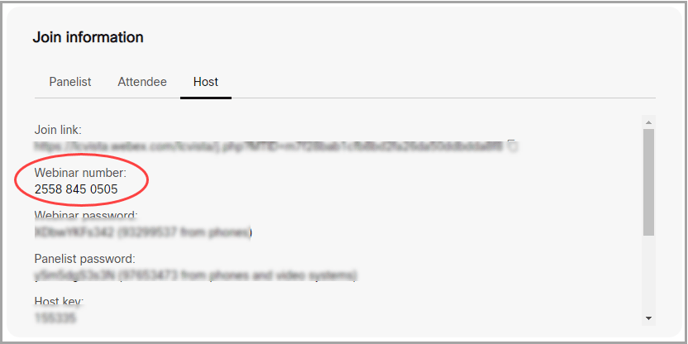
- Webinar/ or Meeting Number
This information is accessible from the form within Webex.
Launching a Session
Once this webcast session has been created and released to end users for enrollment on LCvista, enrolled professionals will have access to a Launch button which will appear on the day of the session, an hour ahead of the session's start time. Professionals will be navigated to the Webex interface upon launch.
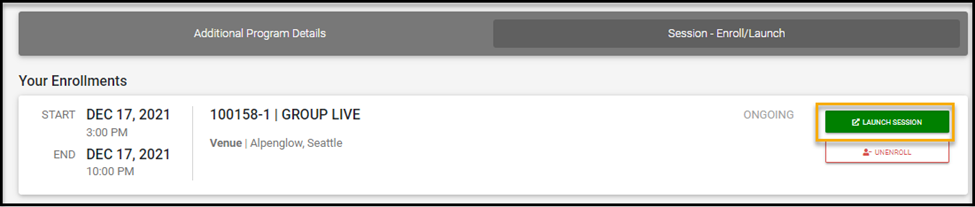
When users launch a session that is linked to Webex, they will first land on the Webex login page where the user must enter in their information before accessing the session.
Best Practices
There are a few items to be aware of when working with Webex Webinars:
- While both Webex Webinars and Meetings are supported, we do not support Meetings when set in Webex as a scheduled recurring series.
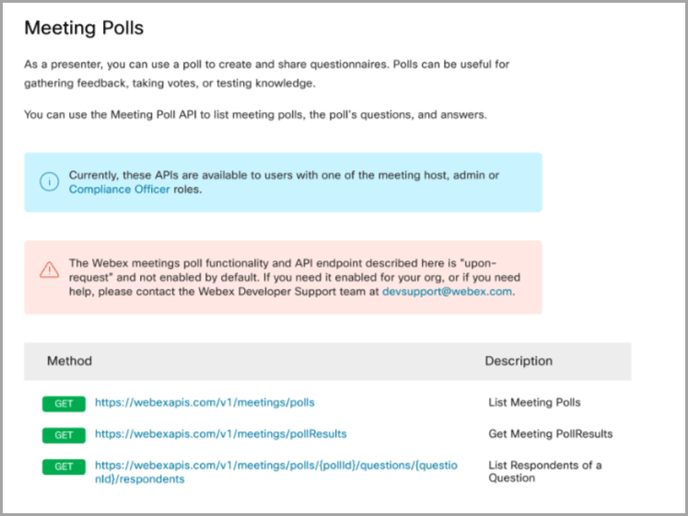
- Polling for both Webinars and Meetings are accessible and will be visible on their correlating Raw Data reports within LCvista. Polls are only visible, when utilizing Webex polls. Polls posed through Slido are not supported.
- To utilize polling in Webex for both Webinars and Meetings, your organization will need to submit a request to Webex to enable API access to Webex Polls and Q&A endpoints (specifically the LCvista integration utilizes Get Meeting Poll Results and List Meeting Q&A, shown in screenshot below.)
- Webex exposes data through the available API endpoints for 7 days from the scheduled start time. Please be sure to pull your raw data report in LCvista within this window.
Processing CPE
What happens after the session concludes? Once your session is over, you will have access to both the Raw Data report as well as the Completion report. Both will assist in processing CPE for your participants.
To learn more about reviewing the Raw Data and Completion reports and processing CPE please review article on Integrations, specifically the section on Reports: Completion Data Report.