
Create groups within LCvista to help automate actions associated to professionals, including: assignments, sending emails and reporting. Learn more about the different group types and best practices associated with managing them.
Groups
Professionals can be grouped together within LCvista to help administrators automate actions, or quickly locate individuals within the site. Administrators can choose from two different group types: Dynamic, or Static.
Dynamic groups are built off rules based on user profile fields. Are you looking to group all members of your Boston Office together? Create a dynamic group with a rule to include all professionals where Office = Boston.
Alternatively, Static groups allow administrators to group specific professionals together where a common theme may not exist.
From the main Groups menu, you have access to search for existing groups by name, along with access to Edit or Delete.
Dynamic Groups
To create a dynamic group, access the Groups menu from the left-hand menu. Select Add Group located on the top right of the form and select Add dynamic group. From this new form, add:
- A Name for this group
- Add a filter(s) to further define your group
- Apply filters to narrow the list of professionals
When you are comfortable with the filters you’ve applied, select Save.
You will be navigated to the Current Members tab of your new group, where you can review the professionals added, along with the filters applied.
If at any point you wish to change your rules, select the Change Rules tab, and adjust your filters as needed.
Tip! As custom field selections change on a professional's profile, professionals can be moved in and out of dynamic groups.
If, for example, I move office locations from Seattle to Los Angeles I would automatically be removed from a dynamic group where the rules defined included: Office Location = Seattle.
Static Groups
To create a static group, access the Groups menu from the left-hand menu. Select Add Group located on the top right of the form. Once selected, you will be prompted to name your group. Once you’ve added a name and selected Submit, you will land on the static group form directly on the Add Members tab.
For a static group, while you can use filters to quickly locate the professionals in question, the filters themselves will not be used as the rule defining this group. Rather, the individuals you have intentionally selected will remain in this group until they are actively removed.
Tip! Choose a static group in cases where you wish to intentionally assign professionals to a specific group and do not wish for professionals to be added or removed automatically based on their profile fields.
Once you have selected your professional(s), select Add Selected Users and they will be automatically added to this group. Choose the Current Members tab to review all individuals assigned to this group.
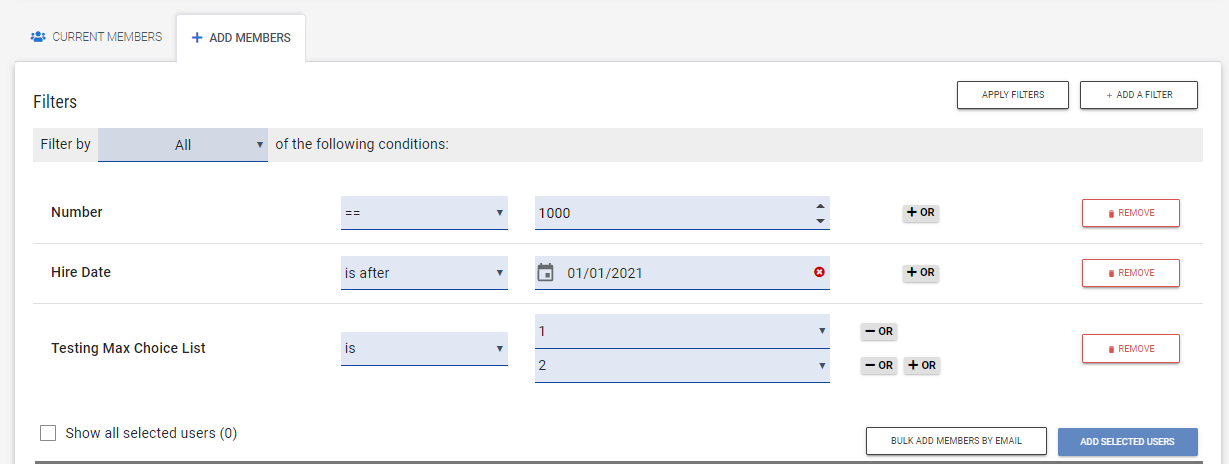
Filters
All custom field types including dates, numbers and choice list, are supported when filtering members to assign to a Group.
- For date based custom fields, filter by date ranges (between), before, or after a specific date.
- For choice list custom fields, select from a pre-populated list of choices.
- For number based custom fields, filter by values that are greater than, less than, or equal to a specific number.
For more information on Custom Field types, refer to our article on Custom Fields.
Additional Actions Available
Your group has been created, now what?
From the edit screen of an existing group, an administrator will have additional access to:
- Admin Roles: this tab will expose any permissions given to your group’s members. Select the Manage Admin Roles button to modify the permissions assigned to this group. When assigning permissions to a group, you can choose whether group recipients can see all users sitewide or if their exposure through that group permission should be limited to the users they manage. For more information on Roles in LCvista, please visit our article here.
- Assigned Programs: this tab will highlight any programs your group has been assigned, listing ID, Name and Due Date. If any assignments exist, you will have access to a View Assignment button which when selected, will direct you back to the Program Actions menu. For more information on Program Actions, please refer to our article here.
- Assigned Learning Plans: this tab will highlight any learning plans your group has been assigned, listing Name and Due Date. If any assignments exist, you will have access to a View Learning Plan button which when selected, will direct you back to the Learning Plan preview page. Alternatively, if you wish to review more details about the Learning Plan assignment, select Show Milestones to review more about this particular assignment. For more information please visit our articles on Learning Plans.
Tip! Returning to the main Group menu is simple, just select the row action menu on the top right of the form and choose Back to Groups.
Access to modify the Group’s name is also available within this row action menu.